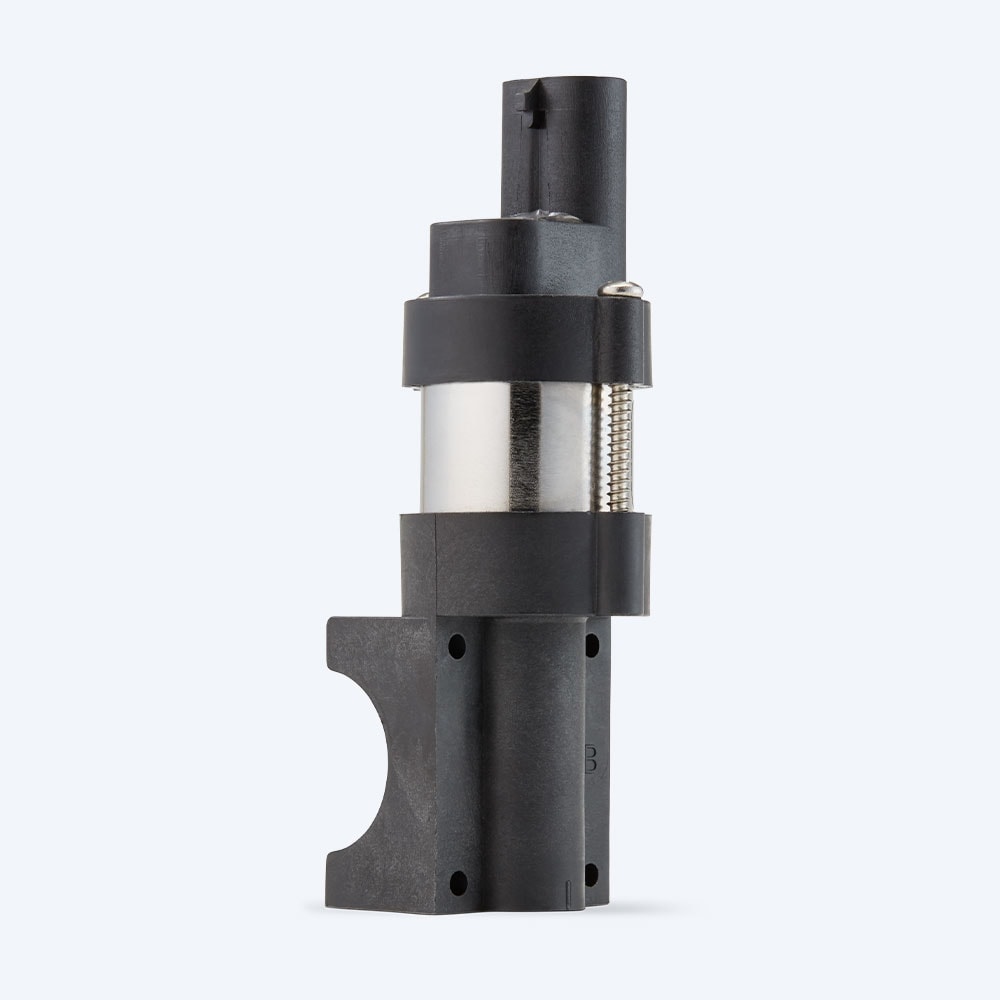
Posted on

2-Way vs 3-Way Motorized Valves: Which One Does Your System Actually Need?

Reading Time: 15 minutes

Choosing between a 2-way and 3-way motorized valve can make or break your system’s efficiency. A 2-way valve with two ports controls fluid flow in one direction—perfect for simple on/off applications like irrigation zones or basic HVAC control. A 3-way valve with three ports handles more complex tasks by mixing or diverting fluids, making it essential for temperature regulation and chemical processing. While 2-way valves are simpler and more affordable, 3-way valves deliver the flexibility needed for dynamic systems. This guide breaks down everything you need to know to make the right choice for your application.


Picture this: You’re halfway through installing a new sprayer system when you realize the valve you ordered can’t handle the temperature mixing your application requires. Now you’re facing downtime, rushed shipping costs, and a frustrated customer. We see this scenario play out more often than you’d think—and it’s almost always because someone chose a 2-way valve when they really needed a 3-way, or vice versa.

The good news? Once you understand how these valves actually work and where each one excels, the choice becomes straightforward. Let’s break down everything you need to know to select the right valve the first time.

Table of Contents

  1. What is a 2-Way Motorized Valve?
  2. What is a 3-Way Valve?
  3. How Does a 2-Way Valve Function?
  4. How Does a 3-Way Valve Function?
  5. Common Applications for 2-Way Valves
  6. Common Applications for 3-Way Valves
  7. Flow Control Mechanisms of 2-Way Valves
  8. Flow Control Mechanisms of 3-Way Valves
  9. Quick Comparison: 2-Way vs 3-Way Valves
  10. How to Choose the Right Valve for Your Application
  11. Frequently Asked Questions

1. What is a 2-Way Motorized Valve?

A 2-way motorized valve is your workhorse for straightforward flow control. With one inlet and one outlet, it operates like a simple on/off switch for liquids or gases. When you need to start or stop fluid flow without any fancy mixing or diverting, this is your valve.

Key Specifications:

  • Port Configuration: 1 inlet, 1 outlet
  • Typical Port Sizes: 1/4″ to 4″ (larger sizes available on request)
  • Pressure Ratings: 50-300 PSI depending on construction
  • Response Time: 2-30 seconds (varies by actuator and valve size)
  • Common Materials: Brass, stainless steel 316, glass-filled nylon
  • Voltage Options: 12V DC, 24V AC/DC, 120V AC, 240V AC
  • Service Life: 50,000-100,000+ cycles

Thanks to their electric actuators, these valves respond quickly and integrate seamlessly into automated systems. You’ll find them in everything from home irrigation controllers to industrial cooling systems. Their simple design means fewer parts to fail, which translates to rock-solid reliability when you need it most.

At Texas Industrial Remcor, we manufacture 2-way motorized valves specifically engineered for agricultural applications where dust, chemicals, and temperature extremes are daily realities. Our most popular model features corrosion-resistant construction and a manual override—because when you’re in the middle of spray season, you can’t afford to wait for an electrician.

2. What is a 3-Way Valve?

A 3-way valve takes fluid control to the next level with three ports that can mix or divert flows between multiple paths. Think of it as a traffic controller that can either blend two incoming streams or redirect one stream to different destinations.

Key Specifications:

  • Port Configuration: 2 inlets + 1 outlet OR 1 inlet + 2 outlets
  • Typical Port Sizes: 1/2″ to 4″ (custom sizes available)
  • Pressure Ratings: 50-300 PSI (application-dependent)
  • Response Time: 5-60 seconds for full stroke
  • Common Materials: Brass, stainless steel 304/316, PTFE seals
  • Voltage Options: 24V AC/DC, 120V AC, 240V AC
  • Modulating Range: 0-100% adjustable flow
  • Service Life: 30,000-60,000 cycles (higher maintenance)

This versatility makes 3-way valves essential when you need precise control over mixing ratios or when one fluid source needs to serve multiple destinations. For example, in an agricultural spray system with both herbicide and water tanks, a 3-way mixing valve ensures you maintain exactly the concentration you need—whether that’s 5% or 15%—automatically adjusting as flow rates change.

The tradeoff? More complexity means a higher price tag and slightly more maintenance. But when your application demands this level of control, there’s simply no substitute.

3. How Does a 2-Way Valve Function?

The operation of a 2-way valve is elegantly simple: it’s either fully open or fully closed. When open, fluid flows directly from inlet to outlet with minimal restriction. When closed, the valve creates a complete seal that stops all flow.

Operating Mechanism:

  • Normally Closed (NC): Remains shut until powered; opens when energized
  • Normally Open (NO): Stays open until powered; closes when energized
  • Power Failure Mode: Returns to “normal” position (critical for safety planning)

The electric actuator typically uses a simple solenoid or small motor to move the valve element. In automated systems, you can add position switches or feedback sensors for monitoring, though many applications work perfectly fine with basic open/closed control.

Here’s what makes these valves so reliable: flow always moves in one fixed direction, which means no confusion about plumbing orientation. This simplicity also keeps energy consumption low—most models draw 5-20 watts during operation, and some newer designs only consume power during the switching action.

Real-World Example: On a center pivot irrigation system, 2-way valves control individual spray zones. When the controller signals zone 3 to activate, the valve opens in under 3 seconds, water flows through that zone, and when it’s time to move on, the valve snaps shut. Simple, reliable, and it happens thousands of times per season without maintenance.

4. How Does a 3-Way Valve Function?

A 3-way valve operates in two primary modes—mixing or diverting—depending on how you configure the ports:

Mixing Mode (2 inlets → 1 outlet): The valve combines fluids from two different sources into a single output stream. The actuator precisely controls how much flow comes from each inlet, letting you dial in exact mixing ratios.

Diverting Mode (1 inlet → 2 outlets): The valve takes flow from one source and directs it to either of two destinations, or proportionally splits it between both outlets.

Operating Mechanism: Unlike the simple on/off motion of a 2-way valve, a 3-way valve uses a more sophisticated actuator that can position itself anywhere from 0% to 100%. This modulating capability allows for continuous adjustment rather than just open/closed states.

Many 3-way valves include feedback sensors that report the current valve position to your control system. This real-time monitoring ensures you’re getting exactly the mixing ratio or flow split you programmed. The tradeoff is higher power consumption—typically 15-30 watts—and the need for occasional calibration to maintain accuracy.

Real-World Example: In a heated livestock watering system, a 3-way mixing valve blends hot water from a boiler with cold water from the main line. When outside temperatures drop, the valve automatically increases the hot water ratio to maintain 55°F at the drinking trough. If the control sensor detects 58°F water, the valve immediately adjusts to add more cold water—all without any human intervention.

At Texas Industrial Remcor, we’ve designed 3-way valves for specialty agricultural applications like automated fertilizer injection systems, where precise mixing ratios directly impact crop yields. Our valves include built-in bypass ports for emergency manual operation—because nitrogen application can’t wait for a service call.

5. Common Applications for 2-Way Valves

2-way motorized valves excel in any application where you simply need to turn flow on or off. Here’s where you’ll typically see them in action:

Agricultural & Irrigation:

  • Zone control in drip irrigation systems
  • Individual spray boom section control
  • Livestock watering system shutoffs
  • Automated pond filling operations

HVAC & Climate Control:

  • Chilled water line control in commercial buildings
  • Hot water baseboard heat zone valves
  • Rooftop unit makeup air control
  • Process air handling unit shutoffs

Industrial & Manufacturing:

  • Emergency coolant shutoff valves in CNC machines
  • Process water control in food processing lines
  • Pneumatic system air line control
  • Wash-down station activation valves

Safety & Protection:

  • Fire suppression system activation valves
  • Emergency chemical process shutdowns
  • Automated flood prevention systems
  • Boiler low-water cutoff protection

Municipal & Commercial Plumbing:

  • Building water service main control
  • Fountain and decorative water feature control
  • Pressure washer system activation
  • Automated restroom fixture control

We regularly supply 2-way valves to sprayer manufacturers who need reliable boom section control. A typical 60-foot boom might have six sections, each controlled by its own 2-way valve. The operator can turn individual sections off when approaching obstacles or when spray overlap would waste product—potentially saving hundreds of dollars per tank on expensive crop protection chemicals.

6. Common Applications for 3-Way Valves

3-way valves are your go-to solution when you need to mix, blend, or divert flows. These applications require the flexibility that only a three-port design can provide:

Temperature Control Systems:

  • Hydronic heating systems mixing supply and return water
  • Industrial process temperature regulation (maintaining 160°F ±2° in a pasteurization line)
  • Greenhouse floor heating with variable outdoor compensation
  • Engine cooling systems with thermostat bypass

Chemical Processing & Mixing:

  • Automated fertilizer injection in greenhouse operations (blending concentrated nitrogen with irrigation water at precise N-P-K ratios)
  • pH adjustment systems in water treatment plants
  • Herbicide mixing stations where concentrate mixes with carrier water
  • Industrial coating systems requiring exact viscosity control

Hydraulic System Control:

  • Mobile equipment with multiple hydraulic circuits
  • Priority valve systems directing flow to critical functions first
  • Pressure relief and bypass circuits
  • Load-sensing hydraulic systems

Multi-Source Distribution:

  • Dual boiler systems with automatic switchover
  • Well water/municipal water blending for agricultural operations
  • Backup generator coolant systems
  • Multiple tank source selection in spray applications

Advanced HVAC Applications:

  • Variable air volume (VAV) box control
  • Energy recovery ventilator mixing dampers
  • Chiller/boiler changeover valves in shoulder seasons
  • Geothermal loop temperature blending

Real Success Story: We recently worked with a large-scale vegetable operation in the Texas Panhandle that needed precise fertilizer injection across 400 acres. They were mixing liquid nitrogen from a bulk tank with well water, but seasonal variations in water pressure kept throwing off their injection rates—sometimes over-applying by 30%, other times under-applying and sacrificing yield.

Our solution used 3-way mixing valves with flow sensors at each field section. The system now automatically adjusts the mixing ratio based on real-time flow data, maintaining their target 28-0-0 concentration regardless of pressure fluctuations. The result? Their fertilizer costs dropped 18% in the first season while yields actually improved by 7% thanks to more consistent nutrition.

7. Flow Control Mechanisms of 2-Way Valves

The beauty of a 2-way valve is in its simplicity. Here’s what makes these valves so reliable:

Binary Operation: With only two states—fully open or fully closed—there’s no ambiguity about valve position. Your system either has flow or it doesn’t. This makes troubleshooting straightforward and eliminates the “is it partially open?” questions that can plague more complex valves.

Simple Actuation: Most 2-way valves use direct-acting solenoids for smaller sizes (under 1″) or spring-return actuators for larger valves. The mechanism is simple: energize to open (or close), de-energize to return to normal position. No complicated positioning logic required.

Pressure Compensation: While pressure differentials do affect flow rates, most 2-way valves can handle significant pressure variations without issue. A properly sized valve will deliver consistent performance across a 50-200 PSI range—covering most agricultural and light industrial applications.

Fast Response: Without the need to modulate position, 2-way valves switch states quickly. Small solenoid valves (1/2″ to 3/4″) typically open in 2-5 seconds. Even larger motorized ball valves (2″ to 4″) usually complete their stroke in 15-30 seconds.

Minimal Moving Parts: Fewer components mean fewer failure points. A typical 2-way valve has one seal, one moving element, and one actuator. Compare that to a 3-way valve with multiple seals and a complex actuator, and you’ll understand why maintenance intervals are longer and reliability is higher.

Dirt Tolerance: 2-way valves handle debris in the fluid stream better than 3-way valves. The straight-through flow path when open means particles are less likely to get trapped or interfere with sealing surfaces.

Low Maintenance Requirements: In agricultural applications, we see properly installed 2-way valves run 5-10 seasons before needing any service beyond occasional visual inspection. The most common “failure” is actually just a dirty coil or coroded wire connection—not the valve itself.

8. Flow Control Mechanisms of 3-Way Valves

3-way valves operate with considerably more sophistication, which brings both advantages and considerations:

Modulating Control: Unlike the binary operation of 2-way valves, 3-way valves can position themselves anywhere along a 0-100% range. This allows for infinite adjustment of mixing ratios or flow distribution. A well-designed control system can maintain mixing accuracy within ±2% across varying flow conditions.

Multi-Path Flow Management: The valve’s internal design creates multiple flow paths that can operate simultaneously. In a mixing application, for example, both inlet ports may be partially open at the same time, with their relative positions determining the final mixture ratio.

Complex Actuation: 3-way valves typically use electric actuators with gear reduction for precise positioning. Better models include internal potentiometers that feed back actual valve position to the controller—essential when accuracy matters. The actuator needs enough torque to overcome fluid pressure on both inlets, which is why they consume more power and cost more than 2-way actuators.

Feedback and Monitoring: Professional-grade 3-way valves often include position indication (either visual scales or electronic feedback) and end-of-stroke limit switches. This real-time monitoring lets your control system know exactly where the valve is and adjust accordingly.

Pressure Sensitivity: Because 3-way valves are managing flow from two sources or to two destinations, pressure imbalances can affect their performance. A 20 PSI difference between inlets, for instance, might shift your mixing ratio from 50/50 to 60/40 if the valve isn’t designed to compensate. Higher-quality valves include pressure-independent characteristics that maintain accurate control even with unbalanced systems.

Maintenance Considerations: The additional complexity means more parts that need occasional attention. Actuator calibration should be checked annually in critical applications. Seals on both inlet ports need periodic inspection. And the more sophisticated electronics may require professional service if problems develop.

Power Requirements: Modulating actuators need continuous power to hold their position in most designs (spring-return models are available but cost more). Count on 15-30 watts during operation—not much, but worth considering if you’re running dozens of valves on solar power.

When Precision Matters: Despite the added complexity, 3-way valves deliver control that simply isn’t possible with 2-way valves. At Texas Industrial Remcor, we’ve supplied 3-way valves for greenhouses where precise temperature control means the difference between thriving orchids and thousands of dollars in lost inventory. In those applications, the extra maintenance and cost are insignificant compared to the value of reliable performance.

9. Quick Comparison: 2-Way vs 3-Way Valves

Feature2-Way Valve3-Way Valve
Port Configuration1 inlet, 1 outlet2 inlets + 1 outlet OR 1 inlet + 2 outlets
Primary FunctionOn/off flow controlMixing or diverting flows
Typical Cost$400-$500 (agricultural-grade)$400-$500 (agricultural-grade)
Installation ComplexitySimple, straightforwardMore complex, requires proper port identification
Control CapabilityBinary (open/closed)Modulating (0-100% positioning)
Response TimeFast (2-30 seconds)Moderate (5-60 seconds)
Power ConsumptionLow (5-20 watts)Moderate (15-30 watts)
Maintenance FrequencyEvery 5-10 years in typical ag useEvery 2-5 years, plus annual calibration checks
Typical Lifespan50,000-100,000+ cycles30,000-60,000 cycles
Pressure DropLow when fully openModerate (due to internal flow paths)
Common Failure ModesSolenoid burnout, seal wearActuator calibration drift, multiple seal leaks
Debris ToleranceGood (straight-through flow)Fair (particles can lodge in ports)
Temperature ControlNot applicableExcellent (can maintain ±2°F)
Best Use CaseZone control, emergency shutoff, simple on/off applicationsTemperature regulation, chemical mixing, multi-source selection
Typical ROI TimelineImmediate (lower cost, basic function)1-3 years (higher cost offset by improved process control)

10. How to Choose the Right Valve for Your Application

Here’s a straightforward decision framework based on decades of working with growers and equipment manufacturers:

Choose a 2-Way Valve When:

  • You only need to start or stop flow (boom section control, zone irrigation)
  • One fluid source serves one destination
  • Binary control is sufficient for your needs
  • Budget is a primary concern
  • Maintenance access is limited (pivot systems, remote installations)
  • Quick response is critical (emergency shutoffs)
  • You’re operating in harsh environments with debris-laden fluids

Choose a 3-Way Valve When:

  • You need to mix two fluid sources at variable ratios (hot/cold water blending, fertilizer injection)
  • One source must serve multiple destinations selectively (dual-circuit hydraulics)
  • Temperature control within tight tolerances is required
  • Flow distribution needs dynamic adjustment based on conditions
  • Your process benefits from modulating control rather than on/off operation
  • You have the budget and maintenance capability for more sophisticated equipment

Still Not Sure? Ask yourself these questions:

  1. Am I combining fluids from two sources? → 3-way valve
  2. Do I need temperature control? → 3-way valve
  3. Am I just turning flow on and off? → 2-way valve
  4. Is my budget under $200 per valve? → Probably 2-way valve
  5. Can I access the valve easily for maintenance? → If no, favor 2-way valve

At Texas Industrial Remcor, we help customers make these decisions every day. Our technical team can review your system design, flow requirements, and operational conditions to recommend the right valve configuration. We’ve engineered custom solutions for everything from simple spray boom controls to complex blending systems for specialty crop applications.

Our Valve Solutions: We manufacture both 2-way and 3-way motorized valves specifically for agricultural and industrial applications. Every valve we build is:

  • Tested rigorously for 10,000+ cycles before shipping
  • Built for harsh environments with corrosion-resistant materials and sealed actuators
  • Customizable to your specific port sizes, voltage requirements, and mounting needs
  • Backed by real support from our Texas-based team who understands your applications

Whether you need a simple on/off valve for boom section control or a sophisticated mixing valve for variable-rate application, we can supply a solution engineered for the demanding conditions you face in the field.

Frequently Asked Questions

What happens if I install a 2-way valve where I really need a 3-way valve?

You’ll lose the ability to mix or divert flows, which means your system can’t perform its intended function. For example, if you’re trying to blend hot and cold water for temperature control, a 2-way valve can only turn the hot water on or off—you can’t modulate the mixing ratio. You’d need to install two separate 2-way valves with complex control logic to approximate what one 3-way valve does simply and reliably.

Can I use a 3-way valve as a 2-way valve by capping one port?

Technically yes, but it’s wasteful. You’re paying for functionality you won’t use, and you’re introducing unnecessary complexity and maintenance. 3-way valves cost 3-4x more than equivalent 2-way valves and require more maintenance. If you only need on/off control, use a 2-way valve and save yourself money and headaches.

How do I size a valve for my application?

Start with your maximum flow rate in GPM (gallons per minute) and your system pressure. Look for a valve with a Cv (flow coefficient) rating that will deliver your required flow at your operating pressure differential. As a general rule: undersizing creates excessive pressure drop and flow restriction, while oversizing wastes money without improving performance. When in doubt, contact us—we’ll help you calculate the right size for free.

What’s the real-world lifespan I can expect from these valves in agricultural applications?

In typical agricultural use with seasonal operation and proper maintenance, expect 10-15 years from quality 2-way valves and 8-12 years from 3-way valves. The key is proper filtration (keep debris out), correct sizing (don’t exceed pressure ratings), and basic preventive maintenance (annual inspection, occasional actuator lubrication). We have customers running our valves for 20+ years in sprayer applications.

Do motorized valves work with my existing controller?

Most motorized valves are compatible with standard irrigation or process controllers. 2-way valves typically just need an on/off signal (closing a relay). 3-way modulating valves need either a 0-10V control signal or a 4-20mA current loop, which most modern controllers provide. Check your controller specs or give us a call—we can often suggest simple adapters if direct compatibility is an issue.

What maintenance do these valves actually need?

For 2-way valves: annual visual inspection, check for leaks, verify electrical connections are tight and corrosion-free. Every 5 years, consider replacing seals if you’re seeing any weeping. For 3-way valves: same annual inspection plus actuator calibration check, verify feedback sensors are accurate, lubricate actuator bearings per manufacturer specs (usually annually). Budget 30 minutes per valve for annual maintenance.

Can I use these valves with fertilizers, herbicides, or other agricultural chemicals?

Yes, but material compatibility matters. Brass and stainless steel valves handle most common agricultural chemicals, but some specialty herbicides or high-concentration fertilizers may require specific seal materials. Always check chemical compatibility for your specific products—we provide detailed compatibility charts with our valves and can recommend the right seal material (Viton, EPDM, PTFE) for your chemicals.

What voltage options are available, and does it matter which I choose?

Common options include 12V DC (battery/solar systems), 24V AC/DC (most agricultural controllers), 120V AC (standard US power), and 240V AC (high-power applications). Choose based on what your power supply and controller provide. Lower voltage systems (12V/24V) are safer for field installations and easier to troubleshoot, while 120V/240V options work well for stationary installations with grid power access.


Ready to Select the Right Valve?

Choosing between 2-way and 3-way valves doesn’t have to be complicated. If you’re still not sure which valve fits your specific application, our technical team is here to help.

Contact Texas Industrial Remcor:

  • Phone: Call us at 254-982-4236 to speak with a technical specialist
  • Email: Send your system details to [email protected] for a free consultation
  • Website: Visit sprayervalves.com to browse our complete valve catalog

We’ve been manufacturing reliable fluid control solutions for agricultural applications for over [X] years. Whether you need a single replacement valve or a custom solution for a new equipment design, we’ll help you select the right product the first time—saving you downtime, return shipping, and frustration.


Texas Industrial Remcor, Inc. manufactures solenoid valves, motorized valves, pressure regulators, and sprayer controls for agricultural, industrial, and municipal applications. Made in Texas. Built for reliability.

Posted on

Control Valve Sizing Guide for Efficient Farming Operations

Reading Time: 8 minutes

Proper control valve sizing is a foundational step in designing efficient and reliable fluid control systems. An incorrectly sized control valve can lead to poor performance, increased maintenance, and even system failure. This guide covers the essentials of control valve sizing to help you avoid common mistakes and optimize your process control.

Table of Contents:

Understanding Control Valve Sizing Basics

At its heart, control valve sizing matches a valve’s capacity to the system’s flow requirements. This is much more than simply picking a valve that fits the pipe diameter. The primary objective is to select a valve that effectively manages the required flow rate while maintaining stable process control over its entire operating range.

A properly sized control valve gives you precise control over the process, which is essential for product quality and system safety. It also helps reduce wear and tear on the valve and associated equipment. Ultimately, a well-sized control valve contributes to energy efficiency and lower operational costs.

Key Factors in Control Valve Sizing

Several variables influence the sizing calculations for control valves. Each one must be carefully considered to achieve an accurate result. Here are the most critical factors you need to gather before beginning any sizing calculations.

Flow Rate

The flow rate is the volume of fluid that must pass through the valve within a specific time frame. This is typically measured in gallons per minute (GPM) for liquids or cubic feet per minute (CFM) for gases. It’s important to know the minimum, normal, and maximum flow conditions to ensure the valve performs well across all scenarios.

Pressure Drop

The pressure drop, or differential pressure, is the difference between the pressure at the valve inlet and the valve outlet. This pressure differential is what drives flow through the valve. Accurately determining the pressure drops at minimum and maximum flow is fundamental for calculating the required valve capacity.

Fluid Properties

The characteristics of the process fluid heavily influence valve sizing. The specific gravity, density, viscosity, and temperature required for the process are all essential inputs for sizing equations. Additionally, the fluid’s vapor pressure is critical for liquid sizing to predict and avoid flashing and cavitation.

For gas or steam services, properties like compressibility and the ratio of specific heats are needed. Understanding the fluid’s potential for corrosion or erosion also guides the selection of the appropriate valve body and valve trim materials. This is an important step in selecting control valve components.

Understanding Flow Characteristics

A valve’s flow characteristic describes the relationship between the valve’s travel (how much it’s open) and the flow rate through it. This relationship is determined by the design of the valve trim. The two most common inherent flow characteristics are linear and equal percentage.

Selecting the right flow characteristic is vital for achieving stable process control. An incorrect choice can lead to a system that is either too sensitive or too sluggish. The decision depends on how the pressure drop changes with the flow rate in your specific system.

Linear Flow Characteristic

A linear valve produces a flow rate directly proportional to the amount of valve travel. For example, at 50% open, the flow rate is 50% of the maximum flow. A linear valve is typically used in systems where the pressure drop across the valve remains relatively constant as the flow rate changes.

Equal Percentage Flow Characteristic

An equal percentage valve produces a change in flow that is proportional to the flow rate just before the change. This means that for each equal increment of valve travel, the flow rate changes by an equal percentage of the previous flow. This type of equal percentage valve is ideal for systems where a significant portion of the pressure drop is lost to the piping and other equipment, resulting in a smaller pressure drop available for the valve at high flow rates.

Choosing the Right Valve Type

The valve style chosen has a significant impact on control performance, capacity, and cost. While there are many designs, a few common types are used in the majority of process control applications. Consulting a valve manufacturer can provide guidance for a specific application.

Valve TypePrimary ApplicationAdvantagesDisadvantages
Globe ValvePrecise flow and pressure controlExcellent throttling, good rangeability, various flow characteristics availableHigher pressure drop, higher valve cost, can be bulky
Ball ValveOn/off service, some throttlingHigh flow capacity, tight shutoff, low pressure drop, relatively inexpensiveLimited throttling capability in standard designs, can have high torque
Butterfly ValveLarge-volume, low-pressure applicationsLow cost, lightweight, good for large pipe sizes, high flow capacityLimited pressure drop capability, can be prone to cavitation
Segmented Ball ValveThrottling control for slurries or fibrous fluidsGood control, high capacity, can handle solids without cloggingMore expensive than standard ball valves, shutoff may not be as tight

Other valve types include cage guided globe valves, which offer better stability and noise reduction. Diaphragm valves are used for corrosive or sterile services. The right valve selection depends on a thorough understanding of the process requirements and fluid properties.

Steps to Size a Control Valve

Now that we have covered the fundamentals, let’s outline the process for sizing a control valve. Following these steps systematically will lead to a correctly sized control valve.

  1. Gather all necessary process data, including flow rates, pressures, temperatures, and fluid properties.
  2. Determine the required flow characteristic (linear or equal percentage) based on the system’s dynamics.
  3. Choose a suitable valve style (e.g., globe valve, ball valve) based on the application requirements.
  4. Perform valve sizing calculations using the appropriate sizing equation to determine the required flow coefficient (Cv).
  5. The flow coefficient is a measure of a valve’s flow capacity; a larger Cv means a higher flow rate for a given pressure drop.
  6. Select a valve from a valve manufacturer’s catalog that provides the calculated Cv and meets all other process requirements.
  7. Verify that the chosen valve operates within an acceptable range of valve travel (typically 20-80% open) for normal conditions.

Many engineers use sizing software provided by manufacturers to simplify these sizing calculations. These tools, often called a sizing calculator, incorporate the complex formulas for liquid sizing, gas sizing, and two-phase flow, reducing the potential for manual errors.

Common Pitfalls in Control Valve Sizing

Even with software, mistakes can happen. Being aware of common pitfalls is the first step in avoiding them. Here are some frequent errors made during valve sizing.

Oversizing

An oversized control valve is the most common mistake. This happens when excessive safety factors are added, leading to a valve that is too large for the service. An oversized control valve will operate very close to its closed position, resulting in poor control, rapid wear on the valve trim, and potential system instability.

Undersizing

An undersized valve is less common but can be just as problematic. This valve will not have enough flow capacity to pass the required flow, even when fully open. This creates a bottleneck in the process and prevents the system from reaching its design capacity.

Ignoring Choked Flow and Cavitation

For liquid services, high pressure drops can cause the fluid pressure to drop below its vapor pressure within the valve body, a point known as the vena contracta. This can lead to flashing or cavitation, which can cause severe damage, noise, and vibration. Correctly accounting for choked flow and the potential for cavitation is critical for the longevity of the valve and safety of the system.

When the pressure at the vena contracta drops to the fluid’s vapor pressure, the flow becomes choked. At this point, further decreases in the downstream pressure will not increase the flow rate. Sizing software can predict these conditions and help select the right valve trim to mitigate the effects.

Advanced Considerations in Control Valve Sizing

Once you have the basics down, some advanced topics can help you fine-tune your valve selection. These factors are often important in severe or critical service applications.

Installed Characteristics

The inherent flow characteristic of a valve can be distorted by the system in which it is installed. The installed flow characteristic is the actual relationship between valve travel and flow in a specific system. Analyzing the installed characteristic helps confirm if the chosen valve will provide good control performance once it is part of the larger process.

Noise and Vibration

High fluid velocities through a control valve can generate significant noise and pipe vibration. This is especially true for gas services with high pressure drops. Special low-noise valve trim designs and sizing calculations are available to predict and reduce valve noise to acceptable levels.

Special Service Conditions

Applications involving high temperatures, high pressure, corrosive fluids, or slurries require special attention. The temperature required for the process affects material selection for the valve body and trim. High pressure applications might demand a specific valve style or pressure class to ensure safety and reliability.

The Impact of Proper Control Valve Sizing

The effort put into correct control valve sizing pays off in several significant ways.

Energy Savings

A properly sized valve minimizes unnecessary pressure drops, which means the pump or compressor does not have to work as hard. This directly translates to energy savings and reduced operating costs over the life of the plant. A smaller pressure drop means less wasted energy.

Improved Process Control

The primary goal of a control valve is to maintain a process variable at its setpoint. A correctly sized valve responds accurately and smoothly to signals from the control system. This leads to more stable operation, better product quality, and reduced process variability.

Extended Equipment Life

By avoiding issues like an oversized control valve, cavitation, and excessive vibration, proper sizing significantly extends the service life of the valve. It also reduces wear on other equipment in the system, like pumps and piping. This lowers maintenance costs and improves overall plant reliability.

Conclusion

Control valve sizing is a detailed but essential part of system design. It requires a solid understanding of fluid dynamics, process conditions, and the different types of valves available. By carefully gathering data, using the right sizing equations, and avoiding common errors, you can select a sized control valve that delivers optimal performance.

Remember that a correctly sized valve is the foundation of effective process control. It contributes to safety, efficiency, and profitability. Taking the time to get the valve size right will provide benefits for the entire lifespan of your system.

Posted on

How to Safely Test a Solenoid Valve: A Step-by-Step Guide

Reading Time: 9 minutes

You’re standing in the middle of a field and the sprayer just quit. Or maybe the irrigation system for a whole section decided not to turn on this morning. This kind of problem often points to a small, but vital, component: a solenoid valve. You’re losing valuable time and money the longer your equipment is down, which makes learning about testing a solenoid valve a skill that pays for itself. Knowing how to troubleshoot this one part can get you back up and running fast.

You do not need to be a master electrician to figure this out. A few simple tools and a clear process are all it takes. So, instead of immediately calling for a costly repair, you can perform your own solenoid valve test right where you are.

Table of Contents:

What Is a Solenoid Valve Anyway?

Think of a valve solenoid as an automatic gatekeeper for air or fluid. It uses an electric current to control a small magnetic piston, called a solenoid plunger. When electricity flows through a wire coil, it creates a magnetic field.

This magnetic field moves the plunger, which either opens or closes the valve. This simple on or off action is what controls hydraulics on a tractor, water flow in an irrigation line, or fuel delivery in an engine. This process is fundamental in many modern automation systems across countless industries.

They are popular because they are reliable and react quickly. While most are simple on-off devices, some systems use proportional valves which can regulate flow more precisely. But like any part with moving and electrical components, they can eventually fail, making troubleshooting solenoid valves a necessary skill. Figuring out if the valve is the real problem is the first step in any testing procedure.

Signs Your Solenoid Valve Might Be Failing

Your equipment will usually give you clues when a solenoid valve is in trouble. It is not always a complete failure. Sometimes the signs are subtle at first, but they point to potential issues you should check out.

Keep an eye and an ear out for any of these common symptoms of a faulty solenoid:

  • The Valve Does Not Open: You activate the switch, but nothing happens. Fluid or air is not being released as it should, suggesting a lack of power or a seized valve.
  • The Valve Will Not Close: The valve is stuck in the open position. This can lead to constant running, leaks, or a loss of system pressure, wasting resources.
  • Strange Noises: You might hear a loud humming or a distinct buzzing that is louder than the normal clicking sound. Some humming can be normal, but a change in the sound can indicate low voltage, high pressure, or debris inside.
  • Leaking Fluid: An external leak around the valve body or its connections is a clear sign of a problem. This often points to failed seals or a crack in the housing.
  • Slow or Partial Operation: The valve might seem like it is trying to work but opens or closes very slowly. This could be due to a mechanical blockage, incorrect voltage, or low system pressure.

If you’re seeing any of these signs, it is a good idea to move on to testing. A proper valve test could save you from replacing a perfectly good part. This process involves checking both the mechanical and electrical sides of the component.

Tools You’ll Need Before You Start

You do not need a whole workshop to test solenoids. Gathering just a few basic tools will make the solenoid testing process smooth and safe. Having everything ready before you begin saves you from running back and forth to the truck.

Here’s a quick checklist of what you should grab:

  • A multimeter (a digital one is easiest to read).
  • Screwdrivers and wrenches that fit your equipment.
  • A pair of safety glasses and other protective equipment.
  • Work gloves.
  • A clean rag for wiping down parts.
  • A pressure gauge (for functional testing).

That is it for the basics. The multimeter is the most important tool on the list. It is the key to seeing what is happening on the electrical side of things.

Step by Step Guide for Testing a Solenoid Valve

Now that you have your tools and a general idea of the problem, you can start the actual test. We will go through this methodically. It is important to follow these steps in order so you do not miss anything and, most importantly, you stay safe.

Step 1: Safety First.

Before you touch anything, you have to make the equipment safe. Electricity and pressurized fluids are a dangerous mix, presenting several safety hazards. Always take a moment to prepare your work area correctly to safely test the component.

Start by completely shutting off the power to the machine you’re working on. The process of disconnecting power might involve turning off a breaker, unplugging the machine, or disconnecting the battery. You want to be certain no electricity can flow to the valve while you handle it.

Next, you need to release any stored pressure in the lines. If it is a hydraulic system, follow the manufacturer’s procedure to depressurize it. The same goes for pneumatic or irrigation systems where trapped air pressure can be dangerous. Failure to do this can result in serious injury.

Step 2: Visual Inspection

With the machine safe, visually inspect the solenoid valve and its wiring. Sometimes the problem is right there in plain sight. This simple check can save you a lot of time and effort.

Look for any frayed or broken wires leading to the solenoid terminals. Check for corrosion on the electrical connections, as this can prevent a good connection. You should also inspect the body of the valve for any cracks, heat discoloration, or other signs of damage.

If you see a loose wire, that might be your entire problem. Go ahead and fix that first. If everything looks to be in good condition, it is time to dig a little deeper with more advanced testing.

Step 3: The Manual Override Test

Many solenoid valves have a small manual override button or screw. This feature lets you physically push the valve open or closed without electricity. It is a great way to separate a mechanical problem from an electrical one.

Find the override on your valve solenoid valve. If you press it and the valve operates, you know the mechanical parts and the solenoid plunger inside are not stuck. This strongly suggests your problem is on the electrical side, either with the coil or the power supply.

But if you activate the manual override and nothing happens, the valve itself is likely seized or has a mechanical blockage. You may need to clean it or just replace the entire valve body. A successful override helps confirm the valve itself is likely functioning correctly on a mechanical level.

Step 4: Testing the Solenoid Coil with a Multimeter

This is where your multimeter becomes your best friend in troubleshooting solenoid issues. The solenoid coil is the part that does the electrical work. It is a long piece of wire wrapped into a tight coil, and if that wire breaks, you have an open coil and the valve stops working.

First, set your multimeter to test for resistance, which is measured in Ohms (Ω). Then, carefully disconnect the wires from the solenoid’s two coil terminals. Touch one probe from your solenoid multimeter to each terminal, making a firm connection on the positive terminal and negative terminal.

You’re looking for one of three possible results when you measure resistance. Knowing what the readings mean is the whole point of this multimeter test. You can get more details about how to properly use a multimeter from professionals who make these tools.

Multimeter ReadingWhat It MeansNext Step
A Stable Resistance ValueThe valve coil is likely good. It has electrical continuity.The problem is probably with the power supply.
OL (Over Limit) or Infinite ResistanceThe coil is open or “burnt out.” The wire inside is broken.The coil is a bad solenoid and needs to be replaced.
Zero or Near Zero OhmsThe coil has a short circuit. The internal wires are touching.The coil is bad and needs to be replaced.

If you get a resistance reading, it should be within the manufacturer’s specified resistance range. A typical 24VDC coil might have a resistance of around 75 Ohms, but the coil typically has its specific value. If you do not have the specs, any stable reading that is not zero or infinite suggests the coil is probably okay; however, a very high resistance reading can also indicate a problem.

Step 5: Checking the Voltage Supply

If the coil test showed good resistance, the coil itself is fine. The problem might be that it is not getting the electricity it needs to function. Now you will use your multimeter to check the power source and verify electrical supply.

Carefully reconnect the wires to the solenoid coil. Set your multimeter to measure voltage, making sure you select AC or DC to match your system. According to the Purdue University Extension, electrical safety on farms is very important, so be cautious during this step where power is applied.

Turn the machine’s power back on and activate the circuit that controls the solenoid valve. With the circuit live, connect power and touch your multimeter probes to the two terminals feeding the supply solenoid. You should see a voltage reading that matches your system’s rated voltage and current ratings, like 12V or 24V. If you get the correct voltage but the valve does not work, you might have a rare case of a good coil that is just too weak. More likely, you have a mechanical issue inside the valve. But if you get a zero or very low voltage reading, it confirms the problem is not the valve at all. The issue is somewhere else in the electrical system, such as a bad switch, a faulty relay, or a broken wire.

Step 6: Functional Pressure Test

Sometimes, electrical tests are inconclusive. A bench test using a controlled air supply can be the final step to test solenoid valves and confirm operation. This is especially useful if you suspect a partial clog or slow operation.

For this test, you will need a regulated air supply, a pressure gauge, and possibly a ball valve to control the flow. First, connect an air filter regulator to your air supply to clean the air and set the pressure. Connect the output from the air filter to the inlet air port of the valve.

Apply the manufacturer-recommended air pressure to the valve. Use your pressure gauge to monitor the gauge pressure. Manually power the solenoid with a power supply that matches the rated voltage. When you apply power, you should hear a crisp click, and the valve should open, allowing air to pass. When you disconnect the power, it should close completely, stopping the flow. Observing this behavior under a specific differential pressure confirms the valve is working correctly.

What to Do After the Test

Your diagnostic work is done. Now you have a clear path forward based on what you found. You are no longer guessing what is wrong with your machine after performing a thorough test solenoid valve procedure.

If your multimeter showed the coil was bad (infinite or zero resistance), the solution is simple. You just need to replace the solenoid coil or the entire solenoid valve solenoid. Make sure you get the correct part number for your valve, as the power supply matches are critical.

If the valve was mechanically stuck, you might try to disassemble and clean it. But in a high-stakes industrial automation or busy farm environment, replacing the entire valve is often a faster and more reliable fix. Downtime often costs more than the part.

Conclusion

When you break it down into simple steps, you will see that testing a solenoid valve is very manageable. You can confidently figure out if the problem is a bad coil, a stuck valve, or an electrical supply issue. This knowledge empowers you to make the right repair, saving you time and money on service calls.

The next time a piece of equipment goes down, you will be prepared for some basic troubleshooting. With a multimeter and a little patience, testing a solenoid is a skill that will serve you well for years to come. Successfully completing this kind of valve test is a satisfying way to take control of your equipment maintenance.

Posted on

Soil Health Improvement Strategies Every Farmer Needs

Reading Time: 13 minutes

Soil is more than dirt beneath your boots. It’s the foundation of all land management and crop production.

When we talk about land, we’re referring to the physical surface of the Earth that supports ecosystems and human activity. Soil is what makes land productive. It’s a living, complex medium made up of minerals, organic matter, water, air, and billions of organisms. You can’t separate healthy soil from a healthy farm. One feeds the other.

So why should you care about soil beyond just getting crops out of it? Because its condition drives how much your land can actually produce—not just this season, but for good.

The Role of Soil in Agriculture

Soil isn’t just a place to anchor roots. It’s an active system that provides everything a plant needs to grow strong and resilient. That includes:

  • Nutrient exchange: The soil holds and transfers essential elements like nitrogen, phosphorus, and potassium to plant roots.
  • Water regulation: Healthy soil acts like a sponge. It stores water during dry spells and drains excess during heavy rains.
  • Biological support: Microbes, worms, fungi, and countless other organisms keep nutrients cycling, suppress disease, and build soil structure.
  • Root support: Dense but porous soils give roots the oxygen and soil contact they need to feed and anchor the crop.

Farms with living, active soil matter don’t just see better growth. They get stronger yields, need fewer inputs, and bounce back quicker from stress. That’s not theory. That’s biology at work.

Soil’s Connection to Ecosystem Sustainability

Soil does more than serve crops. It filters pollutants, supports biodiversity, stores carbon, and slows erosion. If you strip it or compact it year after year, nature stops cooperating. Production suffers, and recovery is slow.

You’re not growing crops in a vacuum. You’re managing a living system. Understanding that early changes how you work the land and where you invest your time and dollars.

Locking in long-term productivity means treating soil as an asset, not just a medium. You take care of it, and it returns the favor.

Principles of Soil Health

If you want soil that works as hard as you do, you’ve got to follow the right principles. Healthy soil doesn’t just happen—it’s built through consistent management that respects how soil biology functions. There are four core principles that guide every decision that leads to better soil health.

1. Minimize Soil Disturbance

Tillage, heavy traffic, and aggressive inputs break down soil structure, disrupt microbial communities, and speed up erosion. You don’t have to abandon steel completely, but cutting back on how often and how deep you till makes a measurable difference. Less disturbance means more stable aggregates, stronger fungal networks, and better water flow. Start with shallow till or strip-till if you can’t go full no-till.

2. Maximize Soil Cover

Bare ground bleeds life. The longer your soil sits exposed, the more it loses moisture, nutrients, and structure. Keeping the surface covered with crop residue or living cover protects against erosion, helps regulate soil temperature, and builds organic matter. Even a light residue layer is better than nothing. Cover is armor—your ground needs it.

3. Promote Plant and Microbial Diversity

Monocultures drain soil biology. When you rotate diverse crops and mix in species-rich cover crops, you feed a wider range of microbes. That unlocks more nutrient cycling, pest suppression, and resiliency. Try integrating small grains, legumes, and broadleafs into your mix. The goal is to support an underground food web that works for you, not against you.

4. Maintain Living Roots Year-Round

Soil life depends on plant roots. They release exudates that feed microbes, stabilize structure, and improve nutrient uptake. When the soil goes rootless for months, biology slows to a crawl. Keeping something growing year-round—whether through cover crops, double cropping, or relay planting—keeps that system alive. Plants don’t just grow in soil, they grow the soil itself.

These principles aren’t theory—they’re the playbook. Use them together, not in isolation. Soil health is a systems game. Each principle reinforces the others, and every time you follow them, you build more productive, resilient, and profitable ground.

Three Sustainable Ways to Sustain Land

If you’re serious about keeping your land productive, you need practices that hold up season after season. Sustainable land management isn’t about quick fixes. It’s about choices that protect your soil, hold nutrients where they belong, and keep biology humming. Let’s go through three approaches that work.

1. Conservation Tillage Practices

Full-width tillage might feel like control, but it comes at a cost—moisture loss, erosion, and worn-out soil biology. Conservation tillage limits that damage. Whether it’s strip-till, vertical till, or full no-till, the goal is the same: disturb the soil less so it can function more.

With less tillage, you’re preserving soil structure, protecting organic matter, and keeping microbial life intact. You’ll also notice better water infiltration and a slower runoff during storms, which means more of your inputs stay in the ground instead of washing away. Start with one field or one crop if you need to ease in, and build from there.

2. Diversified Crop Rotations with Cover Crops

One crop, year after year, is an open invitation for pests, weeds, and nutrient burn-out. Rotating crops breaks that cycle. Mix in small grains, legumes, and broadleafs to change root exudates, nutrient demands, and canopy structure. That crop diversity pays off below ground too, feeding a stronger, more balanced microbial population.

Pair those rotations with cover crops to fill in the gaps. Covers keep living roots in the ground, build organic matter, and protect the surface between cash crops. The right combo boosts resilience while giving your base crops a boost in fertility and soil structure. Plan covers based on your rotation, not separately—it’s all one system.

3. Responsible Nutrient Management

Pouring on fertilizer doesn’t guarantee a yield spike. It often just feeds runoff, not roots. Responsible nutrient management means matching application to what’s actually available in your soil and what your crop will realistically use.

Test regularly. Apply nutrients based on need, not habit. Use the 4R framework: right source, right rate, right time, right place. That stops over-application and keeps fertility from turning into a liability.

Bottom line: Sustain your land, and it sustains you. These three methods aren’t optional if you’re in it for the long haul. They’re the practical framework for farming smarter with what you’ve got, while building a soil system that gives back every year.

Improving Soil Quality Through Nutrient Management

If you want healthier soil, start by getting smart about nutrients. They’re at the core of what makes soil productive—physically, chemically, and biologically. But just dumping fertilizer doesn’t mean your plants are getting what they need or that your soil is improving. You’ve got to manage nutrients in a way that builds long-term fertility, not just chases yield.

Know What the Soil Needs (and When)

Soil nutrients fall into three categories: macronutrients, secondary nutrients, and micronutrients. The big three—nitrogen, phosphorus, and potassium—get most of the attention, but they’re just part of the equation. Calcium, magnesium, sulfur, and trace elements like zinc and boron all play crucial roles too. Deficiencies or imbalances in any one of them can throw off plant health, regardless of how much N-P-K you apply.

Think of nutrients like a balanced meal for your crops. Too much of one, not enough of another, or poor timing can reduce uptake and efficiency. Soil tests are non-negotiable. If you’re not pulling regular samples and making adjustments based on test data, you’re guessing—and that guesswork costs you both in dollars and productivity.

Boost Availability with Organic Amendments

Synthetic fertilizer alone won’t carry you. You need to feed your soil, not just your crops. Organic amendments like compost, manure, and biosolids do more than add nutrients. They also improve soil structure, buffer pH, and promote microbial activity that helps release locked-up nutrients. That enhances both short-term availability and long-term soil health.

If your soil biology isn’t active, nutrient cycling stalls. Organic matter keeps it running. It fuels microbes, holds moisture, and improves cation exchange capacity (how well soil holds and releases nutrients). Aim to build and maintain organic matter through well-composted inputs and crop residue returns.

Balance Inputs to Protect the Soil System

Over-application is just as harmful as deficiency. Too much nitrogen can burn roots and feed weeds. Excess potassium can block magnesium uptake. Everything in the soil ecosystem is connected. Use the 4Rs again here: right source, right rate, right time, right place. That’s how you get nutrients where they’re needed without wasting money or damaging the system.

The payoff? Nutrient-rich soils with better structure, stronger biology, and fewer input losses. You’ll see crops responding more consistently, with fewer stress symptoms and better use of each pound you apply. That’s how you build soil quality that lasts season after season.

Soil Health Improvement Practices for Farmers and Agriculture Supply Distributors

You don’t need a whole new system. You just need to upgrade how you manage the one you’ve got. Good soil health doesn’t come from one silver bullet—it comes from reliable practices that build soil function over time. That includes how you manage the ground, and even more importantly, what support and tools are available to keep those practices working season after season. Here’s what you should be focusing on.

Reduced and No-Till Farming

When you stop tearing up the soil every season, good things start happening underground. Reduced or no-till farming leaves soil structure intact, helps retain moisture, and supports microbial life. It also cuts back erosion and fuel costs in one move.

For farmers, transitioning to no-till can start field by field. For distributors, this means investing in and recommending the right attachments, openers, and drills designed for low-disturbance seeding. You’re not just selling hardware—you’re keeping a soil-building system in motion.

Cover Cropping to Keep Soil Alive

Covers fill the biological gap between harvests. Roots in the ground feed the microbes, add organic matter, and hold the soil in place. From legumes fixing nitrogen to grasses improving water infiltration, cover crops are one of the best tools we have for rebuilding soil function without overhauling your cash crop program.

Farmers should choose species blends that match their goals—whether it’s nitrogen-fixing, weed suppression, or erosion control. Distributors help here too by stocking blends tailored to local crop rotations and soils, and by offering technical support to make seeding and termination easier for growers new to the practice.

Rotations That Build Balance

Don’t let your soil hit repeat too often. Mixing in crops with different rooting patterns, nutrient demands, and residues adds complexity that benefits both the soil and the grower. A three- or four-crop rotation with covers slots in smoothly on most Midwestern or Plains operations. That mix fuels soil microbes, breaks pest cycles, and sets up healthier yield potential.

Supply partners have an opening here to support seed planning, fertility shifts, and crop protection adjustments across more diversified systems. As rotations advance, so do input needs—and someone has to help farmers stay ready for that curve.

Organic Amendments That Feed the System

Organic matter is the currency of healthy soil. Manure, compost, and biosolids help replenish what gets mined out season after season. These inputs improve nutrient retention, moisture-holding capacity, and biological activity. But the value depends on source, timing, and application method.

For farmers, that means knowing what’s in your amendment and applying it when the soil can use it. For distributors, it means offering amendments alongside spreaders, injectors, and advice that keep those nutrients from washing away or volatilizing before the crop can capture them.

Bottom line: soil health improvement is a partnership effort. Farmers make day-to-day decisions that shape outcomes, but ag distributors play a huge role in keeping the system working. That includes the right tools, the right inputs, and the right advice delivered at the right time. When both sides do their part, the land stays productive, and the business stays resilient—for everyone.

Integrating Soil Health into Soil Farming and Agriculture Equipment Use

Original Equipment Manufacturers are in a prime position to move soil health forward by rethinking how iron hits the ground. Farmers are waking up to the fact that soil’s not just something to push around—it’s a living system they need to protect. The equipment they use needs to match that priority. That means fewer passes, gentler handling, and smarter integration with biology-first management practices.

Design with Soil Health in Mind

If your machine fights against the soil health principles farmers are trying to follow, it’s not helping anyone. Your gear should support:

  • Minimal disturbance: Make it easier for operators to shift from traditional tillage to low-impact systems. Think strip-till toolbars with customizable row units, coulters that handle high-residue, and drills that give consistent depth without tearing up structure.
  • Cover crop compatibility: Equipment needs to handle seeding, terminating, and working around growing covers. That includes adjustable row spacing, roller crimpers with flexible mounts, and interseeders that let growers feed biology between rows without compromising yield.
  • Precision placement: Soil health gains fade if nutrients and amendments get misapplied. Planters and applicators with sectional control, variable rate tech, and easy calibration empower farmers to hit the 4Rs—right source, right rate, right time, right place—without waste.

You don’t need to chase every trend. But you do need to make machines that cooperate with biology, not just the horsepower.

Promote What Your Gear Enables

It’s not just about what your equipment does. It’s about what the farmer gets from using it.

  • Don’t just say your tool “plants.” Show how it enables single-pass seeding into residue without compacting the root zone.
  • Highlight how row cleaners or gauge wheels adjust for uneven ground so covers don’t get ripped up before they deliver their benefit.
  • Point out efficiencies in nutrient placement that reduce input needs while maintaining yield potential.

The message matters. Speak directly to the benefits that connect soil health and bottom-line results.

Lead with Innovation That Solves for Soil

Real innovation isn’t about bells and whistles—it’s about removing friction. Farmers don’t want more complexity. They want tools that allow them to adopt sustainable practices without giving up performance or profitability.

Design for easier in-field adjustments. Use sensors or controls that react to residue density or moisture variability. Build durable systems that handle high-residue conditions without clogging or dragging. Make maintenance straightforward so downtime doesn’t get in the way of good management.

If your equipment helps farmers adopt better soil health practices without extra headaches, they’ll stick with it. And they’ll remember who made that shift possible.

You’re not just making machines. You’re shaping how tomorrow’s fields get managed. Build for the direction agriculture is going, not just the way it’s always been done. Soil health isn’t a side-note anymore. It’s the main event—and your equipment should help lead the charge.

Why Conserving Soil Is Important for Long-Term Agricultural Sustainability

Lose your soil, and you lose your operation. It’s that straightforward. Every acre you farm depends on keeping that topsoil in place, biologically active, and structurally sound. If you’re not protecting your soil, you’re burning through your most valuable resource faster than you can replace it.

Stop Erosion Before It Starts

Water and wind erosion don’t ask for permission. They just strip away your productive layer and take nutrients and organic matter with them. Once that surface is gone, rebuilding takes serious time and money. Conservation practices—like cover crops, reduced tillage, buffers, and residue management—hold soil where it belongs.

You can’t afford to treat erosion like a future problem. Every year it eats away at your fertility, flattens your yield potential, and increases input dependency. If you want long-term returns from your land, start now. Protect the surface, and you protect everything else that follows.

Preserve Productivity by Protecting the Biology

Soil isn’t just dirt. It’s a biological engine. Worms, microbes, fungi, and bacteria all team up to unlock nutrients, suppress disease, and build structure. When you overwork or underfeed that system, it grinds to a halt.

Practices like crop rotation, organic inputs, and maintaining living roots year-round help keep the biology inside your soil firing on all cylinders. That means less disease pressure, better nutrient use, and a more stable yield base year after year. Soil conservation isn’t just about what you’re keeping out of the river—it’s about what you’re enabling under your boots.

Support Environmental Quality Without Compromising Yield

Conserved soil does more for your neighbors—and your own operation—than you might think. Healthy, covered soil reduces nutrient runoff that would otherwise end up in local waterways. It also stores more carbon, improves air quality, and moderates temperature swings in your fields.

Protecting your soil doesn’t mean giving up performance. In fact, the longer you keep that soil structure intact and the biology active, the more efficient your inputs become. Less waste. More response. Cleaner water. Stronger crops. It adds up.

Build Resilience for the Next Generation

Great soil isn’t built in a season—it’s managed across decades. That means your decisions today shape what the next operator inherits. Whether it’s your own kids or another grower down the line, they’ll be dealing with the soil legacy you leave behind.

Conserving soil is the difference between an operation that endures and one that burns out. If you want your land to produce for next season, it’s time you manage it like you’re sticking around.

Every pass you make is either building resilience or chipping away at it. Choose soil practices that keep your ground productive, fertile, and farmable for the long haul. That’s real sustainability—and that’s how you stay in the game longer than the guys chasing short wins.

Posted on

How to Winterize Your Sprayer for a Flawless 2026 Season: A Texas-Tough Guide

Reading Time: 6 minutes

As the Texas fields turn golden and the crisp fall air signals the end of the growing season, it’s time to give your agricultural sprayer the attention it deserves. Winterizing your sprayer isn’t just a chore—it’s a critical step to protect your investment, avoid costly repairs, and ensure peak performance when spring planting rolls around. At Texas Industrial Remcor (TIR), we’re a family-owned manufacturer of high-reliability solenoid valves, sprayer controls, pressure regulators, and motorized valves, built to withstand the toughest conditions from dusty Panhandle farms to rugged oilfields. In this comprehensive guide, we’ll walk you through expert winterization tips, highlight top replacement parts, and show how TIR’s American-made solutions keep small to medium farms, OEMs, and ag distributors spraying strong. Let’s get your sprayer winter-ready for a bold 2026!

Why Winterizing Your Sprayer Matters

Agricultural sprayers—whether boom sprayers for small farms or high-capacity systems for medium operations—are the backbone of precision application, delivering fertilizers, pesticides, and herbicides with pinpoint accuracy. But when winter hits, freezing temperatures can wreak havoc on these machines. Leftover water or chemical residues can freeze, expand, and crack critical components like pumps, hoses, valves, and nozzles. Industry data shows that improper winterization leads to 10-15% of sprayers needing repairs costing $1,000-$5,000 per season, with downtime slashing yields during critical planting windows. For OEMs integrating sprayer systems and distributors stocking parts, these failures translate to warranty claims and lost customer trust.

Winterizing your sprayer is your cold-weather superpower. It prevents corrosion, clogs, and cracks, saving you from expensive fixes and ensuring your equipment is ready to roll when fields thaw. Plus, with 2025’s tariff-driven supply chain disruptions pushing lead times for replacement parts by 20-30%, proactive maintenance is more critical than ever. TIR’s Texas-made valves and controls, like our SV.2501B solenoid valve, are engineered for durability in harsh conditions, but even the toughest gear benefits from proper care. Let’s dive into the steps to winterize like a pro, tailored for farmers, OEMs, and ag distributors.

Step-by-Step Guide to Winterizing Your Sprayer

Follow these TIR-approved steps to protect your sprayer from winter’s wrath. Whether you’re a small farmer running a 500-acre operation, an OEM designing next-gen booms, or a distributor like Nutrien or CHS stocking parts, these tips ensure longevity and performance.

1. Rinse It Clean: Clear Out Residues

Chemical residues from fertilizers or pesticides can corrode metal components and clog nozzles, leading to uneven spray patterns in spring. Start by thoroughly rinsing your sprayer’s tank, hoses, and boom with clean water. For stubborn residues, use a sprayer-specific cleaning solution (e.g., TankMix Cleaner) to break down chemical buildup. This step is critical for small farmers who can’t afford downtime and for distributors facing 10-15% return rates on faulty valves due to corrosion.

Pro Tip: TIR’s solenoid valves, with corrosion-resistant seals, are built to handle aggressive slurries, but a clean rinse extends their lifespan by 25%. Check our catalog at sprayervalves.com/catalogs for compatible cleaning kits.

2. Flush with Flair: Deep-Clean the System

After rinsing, flush the entire system—tank, pump, hoses, and nozzles—with clean water to ensure no residue remains. For high-viscosity chemicals, add a cleaning agent and run it through the system for 5-10 minutes. This prevents clogs in precision components like TIR’s E-Chip™ solenoid valves, which maintain 175 PSI accuracy even in wet harvests. OEMs integrating these valves into John Deere or Case IH sprayers can reduce prototype failures (currently 20% due to slurry issues) by ensuring clean systems before storage.

For Distributors: Stocking TIR’s pre-assembled repair kits ensures your customers can flush and fix fast, cutting service calls by 15%. Contact us for bulk pricing at sprayervalves.com/contact.

3. Freeze-Proof It: Antifreeze Protection

Freezing is the number-one winter threat to sprayers. Water left in lines or pumps can expand, cracking components and costing $500-$2,000 in repairs. Pump RV-grade antifreeze (non-toxic, propylene glycol-based) through the entire system, including the tank, pump, hoses, boom, and nozzles. Ensure every valve, like TIR’s motorized valves, is filled to prevent ice damage. This step is a game-changer for medium farms facing tight planting windows and OEMs avoiding warranty spikes from cracked solenoids.

Data Point: Proper antifreeze use reduces spring startup failures by 30%, saving farmers an average of $1,200 per sprayer annually.

4. Pamper the Parts: Clean and Lubricate

Remove and inspect filters, strainers, and nozzles for wear or debris. Clean them thoroughly and store in a dry, labeled container to avoid misplacement. Apply a light lubricant (e.g., silicone-based grease) to pumps, valves, and O-rings to prevent drying or cracking. TIR’s solenoid valves, with modular designs, are easy to disassemble and maintain, a boon for distributors servicing small farms with limited techs (facing 15% labor shortages in 2025).

OEM Advantage: TIR’s plug-and-play valve kits reduce assembly time by 40%, streamlining maintenance for your production lines. Request a free audit to see the ROI at sprayervalves.com/contact.

5. Tuck It In: Safe Storage

Store your sprayer in a dry, sheltered location—ideally indoors—to protect it from Texas cold snaps, UV rays, and moisture. If outdoor storage is unavoidable, use a weatherproof cover and elevate the sprayer to avoid ground moisture. This protects critical components like TIR’s pressure regulators, which maintain 20% better flow consistency in harsh conditions compared to competitors like TeeJet. For distributors, proper storage advice can reduce customer returns by 10%, boosting margins in a market facing 12% sales declines.

Replacement Parts: Your Sprayer’s Backup Crew

Winter prep often reveals worn parts needing replacement. TIR’s American-made components are built for longevity, offering farmers, OEMs, and distributors reliable solutions to keep sprayers running smoothly. Here’s what we bring to the table:

  • Solenoid and Motorized Valves: Our SV.2501B solenoid valves and motorized controls deliver precision fluid control, with 25% fewer failures in wet harvests compared to industry averages. Perfect for small farmers needing durability and OEMs seeking seamless integration.
  • Repair Kits: Pre-assembled kits for quick fixes, reducing downtime by 30% for medium farms and distributors servicing urgent orders.
  • Expert Support: Our Texas-based team offers personalized guidance, from part selection to troubleshooting, ensuring zero headaches.

For distributors like Nutrien or GROWMARK, stocking TIR parts means faster inventory turns and fewer stockouts (currently plaguing 40% of ag retailers during peak seasons). OEMs like AGCO can leverage our field-tested ROI data, showing $500/season savings per sprayer, to justify partnerships. Explore our full range at sprayervalves.com/catalogs.

Why Winterization Pays Off: The Big Picture

Winterizing your sprayer isn’t just about avoiding repairs—it’s about maximizing ROI and staying ahead in a challenging ag market. With 2025’s tariffs inflating component costs by 15-20% and supply chain delays hitting 30% longer lead times, proactive maintenance is a competitive edge. For small farmers, it means protecting a $50,000 sprayer investment. For medium farms, it’s about ensuring 500+ acres are sprayed on time. OEMs avoid costly prototype failures (20% of new sprayer designs fail due to valve issues), while distributors dodge margin hits from returns and stockouts.

TIR’s Texas-tough valves are designed to thrive in these conditions. Our TIR E-Chip™ technology runs 30% cooler, reducing energy use for sustainable operations—a key selling point as 70% of OEM partnerships now prioritize ESG compliance. Plus, our U.S.-based manufacturing sidesteps tariff delays, guaranteeing 2-week delivery for distributors like CHS facing supply crunches.

TIR: Your Texas-Proud Partner for 2026 and Beyond

As a family-owned manufacturer, TIR pours heart and grit into every valve, control system, and customer call. Our American-made products are built to endure the harshest conditions, from dusty fields to high-pressure OEM lines. Whether you’re a small farmer, an OEM like John Deere, or a distributor like Nutrien, we’re here to keep your sprayers running at peak performance.

Join the TIR Journey:

  • Follow Us on X: Catch the latest on our 2026 launches and ag industry tips. Search #SprayerWinterization for community insights.
  • Get in Touch: Need parts, advice, or a custom OEM solution? Reach out at sprayervalves.com/contact—we’re all ears.
  • Explore Our Catalog: Browse valves, kits, and controls at sprayervalves.com/catalogs.

Call to Action: Winterize Today, Win Tomorrow

Don’t let winter sneak up on your sprayer. By rinsing, flushing, freeze-proofing, lubricating, and storing properly, you’ll protect your equipment and set the stage for a blockbuster 2026 season. For OEMs, TIR’s plug-and-play kits streamline production and cut downtime. For distributors, our reliable parts boost margins and customer loyalty in a tough market. And for farmers, our Texas-crafted solutions mean your sprayer’s ready when the fields are.

Ready to winterize like a pro? Contact our Texas team today for personalized support or request a free valve audit to quantify your savings. Let’s make 2026 bigger, bolder, and unmistakably Texas!

Posted on

Bistable

Reading Time: 1 minute

Characteristics
Two stable states: A bistable solenoid valve can maintain its position in either of two states without continuous power.
Energy-efficient: It consumes power only during the switching process, making it more energy-efficient than other types of solenoid valves.
Manual override: Many bistable valves come with a manual override feature, allowing for operation without electrical input.
Reliable: These valves are known for their reliability and longevity, as they do not require constant power to hold their position.

Examples
Bistable solenoid valve in pneumatic systems: Used to control air flow in applications where maintaining a specific position is crucial, such as in automated machinery.
Bistable solenoid valve in irrigation systems: Employed to switch between different watering zones without needing continuous power, enhancing energy efficiency.
Bistable solenoid valve in automotive applications: Utilized in systems that require switching between two states, such as locking mechanisms or fluid control systems.

Posted on

Electromechanical

Reading Time: 1 minute

An electromechanical device combines electrical and mechanical processes to perform a specific function. In the context of solenoid valves, this means that the valve’s operation is controlled by an electrical signal, which activates a solenoid to move a plunger or armature, thereby opening or closing the valve.

Characteristics:
Electrical Activation: Operated by an electrical current that energizes the solenoid.
Mechanical Movement: Converts electrical energy into mechanical movement to control fluid flow.
Quick Response: Provides rapid actuation, allowing for fast opening and closing of the valve.
Precision Control: Enables precise control of fluid dynamics in various applications.

Examples:
Automotive Applications: Used in fuel injection systems to control the flow of fuel.
Industrial Automation: Employed in manufacturing processes for controlling pneumatic or hydraulic systems.
Home Appliances: Found in washing machines to manage water intake and drainage.
HVAC Systems: Utilized to regulate the flow of refrigerants or water in heating and cooling systems.

Posted on

Ball Valve

Reading Time: 1 minute

A ball valve is a type of valve that uses a spherical disc, known as a ball, to control the flow of fluid through it. The ball has a hole or port through the center, allowing fluid to pass when the valve is open. When the ball is rotated 90 degrees, the port is perpendicular to the flow, effectively shutting off the flow.

Characteristics
Quick Operation: Ball valves can be opened or closed with a quarter turn, making them easy to operate.
Tight Seal: They provide a reliable seal, preventing leaks when closed.
Durability: Made from robust materials, ball valves are designed to withstand high pressure and temperature.
Versatility: Suitable for various applications, including water, gas, and oil.

Examples
Full Port Ball Valve: This type has a ball with a hole that matches the pipe diameter, allowing for maximum flow.
Reduced Port Ball Valve: The ball has a smaller hole, which can restrict flow but is often more compact.
Trunnion Ball Valve: This design features a trunnion that supports the ball, making it suitable for high-pressure applications.

Posted on

Air Pressure

Reading Time: 1 minute

Air pressure is the force exerted by the weight of air above a given point, typically measured in pounds per square inch (psi) or pascals (Pa). It plays a crucial role in various applications, including the operation of solenoid valves, which rely on specific pressure levels to function effectively.

Characteristics
Measurement Units: Commonly measured in psi, bar, or kPa.
Atmospheric Pressure: Standard atmospheric pressure at sea level is approximately 14.7 psi (101.3 kPa).
Variability: Air pressure can change with altitude, weather conditions, and temperature.
Impact on Systems: Variations in air pressure can affect the performance of pneumatic systems and solenoid valves.

Examples
Pneumatic Tools: Air pressure is essential for the operation of tools like nail guns and air compressors.
Weather Systems: High and low-pressure systems influence weather patterns, affecting air pressure readings.
HVAC Systems: Air pressure is crucial in heating, ventilation, and air conditioning systems for proper airflow and efficiency.

Posted on

Flow Rate

Reading Time: 1 minute

The flow rate refers to the volume of fluid that passes through a given point in a system over a specified period of time. It is a crucial parameter in the design and operation of solenoid valves, as it determines how effectively a valve can control the flow of liquids or gases.

Characteristics
Measurement Units: Commonly measured in gallons per minute (GPM), liters per minute (LPM), or cubic meters per hour (m³/h).
Influencing Factors: Flow rate can be affected by factors such as pressure, temperature, and the viscosity of the fluid.
Valve Sizing: Proper sizing of solenoid valves is essential to ensure that they can handle the desired flow rate without causing excessive pressure drops or inefficiencies.

Examples
– A solenoid valve in a water irrigation system may have a flow rate of 10 GPM, allowing it to efficiently distribute water to crops.
– In a pneumatic system, a solenoid valve might control air flow with a flow rate of 50 LPM, ensuring that machinery operates smoothly.